Posts

Showing posts from 2017

Draco Malfoy

Image
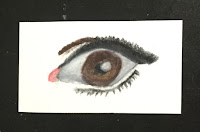
        The Harry Potter series is filled with many complex, alluring characters, but my favorite one has to be Slytherin King Draco Malfoy. Therefore, it only made sense that I tried (emphasis on tried ) to draw him with my pencils. Surprise, surprise... it looks nothing like Tom Felton (the wonderful actor who portrayed said character).          I am very happy that I was able to get the sharp angles associated with Draco, without ruining the realistic aspect. Also, the eyes came out amazing! I used silver for the most part, but, when used properly, black can do wonders.          However, the face should have been sketched slightly more tilted down, and the eyes shouldn't be so sleepy looking.  The shadows are really badly executed.  Also, the ear is absolutely   horrid .          Apart from satisfying my inner fangirl, this project was to help me improve my hair (like so many other drawings). This includes the hair (ok) and the ear (not so ok). I used two different referenc

Light As Many Candles As Possible

Image
        My second post is about another original drawing. It depicts a girl in a gown, going up a flight of stairs, a ball of fire in her hands. Each step has a small candle, and the steps she had already passed have lit candles, whereas the ones to be crossed are unlit. I got the idea from an article I had read that was about  trying to make the world better by helping as many people as possible. The phrase really inspired me, and an image formed in my head.          This is in fact a mixed media piece, composed of part wax-based color pencil and part watercolor. I used my color pencils for the figure, candles, the window frame, and the flames.         I first started with the sky when I switched to watercolor. I wanted it to look like dusk was falling, to fill up the world with darkness. I was unsure of how I would fare, but the results have definitely satisfied me. *I also used washi tape to mark off the border.* W/ sky         Finally, I filled in the stairs and

Little Tulip

Image
        Little Tulip is one of my latest watercolor pieces, although the outline had been completed months ago. It is one of my original dress designs, inspired by a flower. The Bodice is the stem and the actual gown is made up of the petals. The bodice color is a bit too bright, making it a bit unnatural. I had tried to make the top part green netting, but the water made the ink spread, so it now looks like a black blotch. The ink also bled into the petals. However, if you look at it from far away, the petals actually look realistic. I do realize this picture could have been better planned. #BadArt

BindeySketch: Eye

Image
        In case you couldn't tell, I love drawing eyes. I draw them when ever I'm bored, or thinking, or don't have any inspiration. I draw them surprised, angry, and neutral. I even draw different types: manga, anime, realistic, cartoon, etc.          This was drawn in the midst of Italian at my middle school. I was waiting for my paper to arrive, so I doodled. Considering i was surrounded by some *ahem* LOUD people, it was a wonder i could do anything (they actually weren't too loud...). But why draw in my mini-binder? Well, that's my school sketchbook. I take it with me everywhere, and use it whenever I feel like it. Carrying it is much easier than carrying a book.         I tried to make the eyelashes more realistic, instead of straight up like a spooked cat's tail. They have more flow to them now. The pupil did become a bit cartoonish in the end, but I could fix it by making the lines inside a bit lighter. I was happy with the way the skin came out,

How I Draw: Brown Hair

        In this How I Draw, I will explain the wizardry of hair. Hair, along with the face, is the most essential part of a portrait. Getting the right feel and depth is very precarious to do, but it isn't impossible. I will be showing the four basic hair colors in four posts.          This post will be for the most simplest of them all: brown hair. I know there are many shades of brown hair, but this will be for dark brown hair. For a darker and lighter shades, change the colors respectively.          The colors used for this project are: -Black                           -Dark Brown -Light Umber -Sienna Brown -Ginger Root           When drawing hair, you always want to go lightest to darkest, because hair is all about the layers. In this case, start by stroking in the Ginger Root, then use the arrays of brown to add shadows, highlights, and other dimensions. Black should be blocked in for the darkest of shadows. For hair, I recommend blending the the colorles

Bella

Image
        This post is about my latest portrait, Bella. Bella is based of of this sketch of a 5-6 year-old. I intentionally made her look older, about 12-13 years old. Look-On         I did tweak the angle and hair a bit. Obviously, you can tell my drawing is the older version of the girl shown. The girl pictured doesn't have a name, so I gave her one. Like Lucy, Bella was named because of how it suited her looks and expression. Bella B&W Bella Colored Black shadows, lips and eyes (eye color: Hazel, colors used: Sienna Brown, Canary Yellow, Olive Green, Dark Green)... Face... Eyebrows and eyelashes,  neck,  shadows to the nose and eyes... Completed nose... Shirt, parts of background... Completed Part 1 of background...         Now, the part we've all been waiting for: Hair! This time, I decided to try ginger/red hair. The colors used, from lightest to darkest, are: Cream (as a base color) Goldenrod (used for line/shape definiti

Lucy

Image
      I am taking a break from the Harry Potter theme to experiment with other ages. The following look-on is a pencil sketch of a  4- or 5-year-old girl.            However, my copy, in my opinion, is slightly older, around 10-11 years old. I didn't stay true to the look-on when it comes to the hair and dress. However, her face is as exact as I can produce.  Black & White Look-On: My Copy:         As you can see, I kept the hair neater and added a headband. The top of the dress is much more simpler, and the straps are a different style. Her face looks a bit more wider because of the lack of shading. Colored:   I colored in the eyes a greenish-blue, using True Blue, Light Cerulean Blue, Indigo Blue, and Spanish Orange... Lips, with flesh tones, pinks, crimson red, and dark brown... Skin with peach and cream, blended with white... Completed skin, nose,  shadows with brown and colorless blender... Eyebrows and eyelashes; softer shadows

How I Draw: Skin

Image
        The skin is a tricky bit of wizardry; One must choose the right colors to get accuracy. I will show you how to draw skin on the same eye we just drew. It is only one part of the puzzle, but it is really up to the artist to choose where to add shadow and etc. Here we go! Here is what we have (I added the eyelid in with a brown ):         First, color in a light layer of cream on the area to be covered (it's okay if the black smudges a bit, you can fix it later).          Then, add a good layer of peach on top of the cream. If you want a more pale complexion, use light peach, whereas browns like light umber are good for a tanned look.           Use the white to blend.          Add more peach.  Blend again with the white. *Now, you can stop here, or you can add shadows and highlights. Read on for highlights and shadows .*         There are two shadows and two highlights to be added. First, the highlights. Using the cream, color in the area above

How I Draw: Eyes

Image
        I pride myself over the realism of the eyes I draw. Here is how I do it: ~~~~~~~~~~~~~~~~~~~~~~~~~~~~~~~~~ Outline         Before coloring, erase the outlines of the eye enough so that you can see the basic shape, but the graphite won't mix.         I always fill in the pupil first. Simply color in the dot solid black. Any highlights overlapping the pupil should be stark white.          Coloring the iris depends on the color. For example, a brown iris should be outlined a very dark brown, and the top third should be that same brown.          In the middle third, slowly decrease the pressure while coloring down until you have a smooth transition from solid color to scraggly remnants. You should end with a color so light it blends in with the white.          The bottom third should be the second or third darkest brown. Pick a shade and repeat the steps used for the top, only going up instead of down. The middle third should now be overlapped by two shades o